The 60-minute knife.
by
Jason Cutter aka Dr Kwong Yeang
Bladesmith, Part-time Knifemaker, Australia
Jason Cutter Bladeart
http://www.jcbknives.com
Originally posted on on BladeForums and the USN
I undertook this project for the heck of it. When forumite 2 knife
suggested we show our “60-minute knives” some makers were skeptical if it
could be done. Here, I show that it CAN be
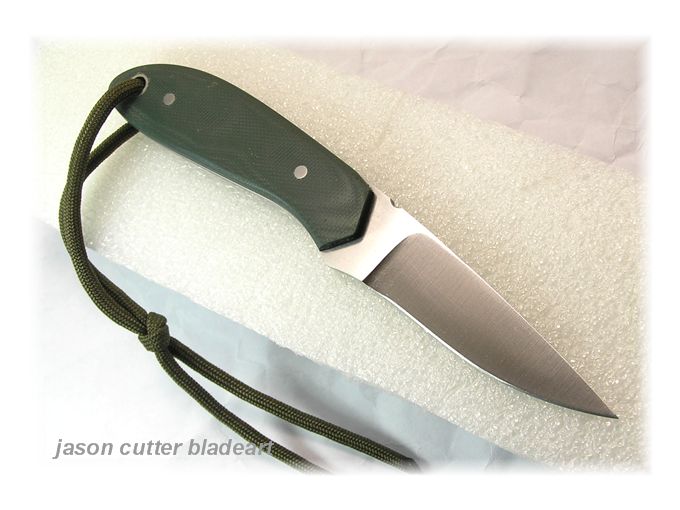
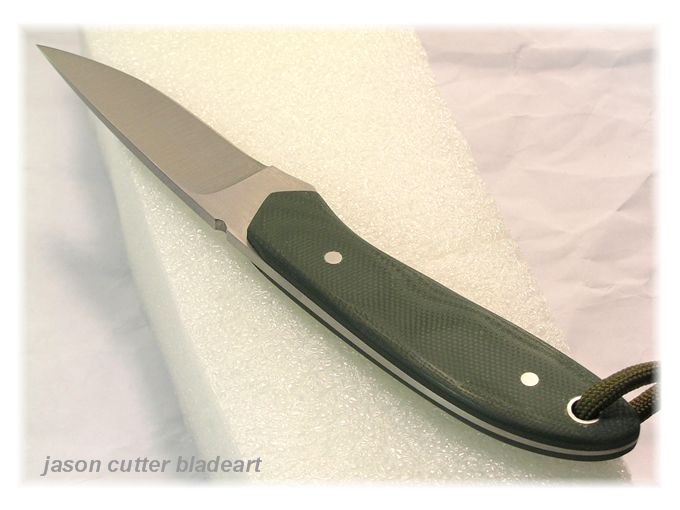
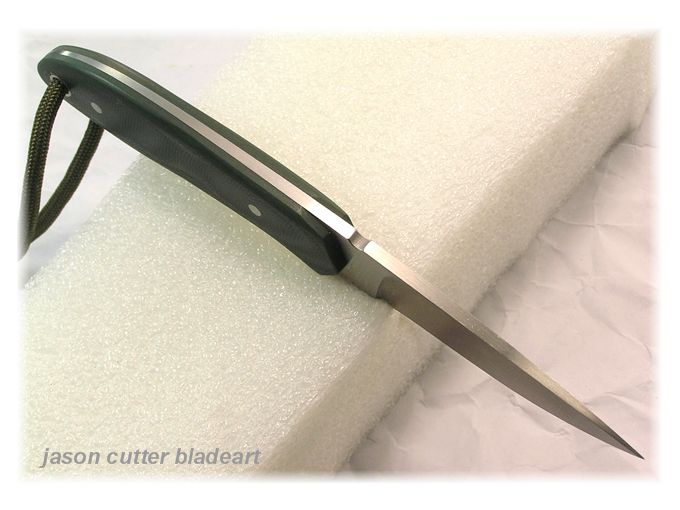
done ! The knife is just a small working knife with synthetic handles & an
machined satin finish. But it is fully funtional and will give pretty good
cutting performance. The finished knife even has a full tapered tang & a
filed thumb traction groove !
I hope I am not coming across as a show-off... just having some fun here.
I spent +++time planning, considering a range of options in my mind & on
paper, before even attempting it. I also had to consider my method of taking
the photos. I had to develop a zen-like state that required complete focus &
zero distractions. Turned the cell phone off, etc. I’d organized all my
materials & equipment & even did some mental trial-runs. Some of the
techniques were visualized down to the absolute detail, including the foot
steps I would take as I pressed the camera button to get back to the grinder,
etc.
Honestly, the entire project took me 68minutes to finish. However,
considering the time it took to set up the camera for each shot, I feel that I
would have completed the knife in under 60minutes. That’s why when the
stopwatch buzzed at the 60minute mark, I kept going & felt I had enough time
to do some further hand sanding & to file in a single traction groove (see the
last frame).
I was very fortunate that I made no obvious mistakes, & didn’t need to
perform any corrections. This is very rare. In addition, virtually all the
photos I took turned out & seemed to be on the mark. This is even more rare !!
So everything really worked out in my favour this one time !! I don’t
pretend that I can actually reproduce this feat. Thinking about my usual
knives, I figure to achieve the same result, I’d usually spend twice as long
working on the knife, so this is not my usual way of making a knife.
BUT… there is ONE major catch.
The technique shown is one of a number of traditional blacksmithing heat
treatment methods. I DO NOT regard this as necessarily the most reliable or
accurate method of tempering a blade. It was chosen simply because it was the
”most reliable” QUICKEST way to temper such a small knife, that I could think
of. I have done this before & I know it works.
My usual method of tempering an O1 carbons steel blade is to temper at
385-390F for 60minutes x 3times. This tempering process alone takes at least
6hours. I guess on a long shot, we could technically ignore this time as I am
not being hands-on & simply waiting for the purposes of the “60-minute knife”
test.
Nonetheless, in making this “60-minute-knife” the outcome of the bare-bones
heat treatment was successful. The blade passed the brass rod edge flex
test & any concern about the accuracy of the tempering process was dismissed.
On close inspection, the machined satin finish is on par with any other
working-grade knife I have made recently. I do this intentionally to reduce
costs & to encourage customers to use such knives. The fit & tolerances are
equivalent to that of my full-house custom pieces. In other words, I have
chosen time-saving techniques, & NOT quality-skimping techniques.
To ensure that I would end up with a knife equal to my other knives I would
proudly sell, I planned that the knife shown at the very end, actually has
scales & pins that are removable. The pins could be tapped out & the blade put
through my usual tempering process to assure quality, then re-assembled.
TIME & EFFICIENCY - DISCLAIMER.
Another thing to say is that, if one were to set up a so-called “production
line” style of making knives, eg.- grinding 20 blades, then heat treat 20
blades, then finish 20 blades, then attach 20 handles, etc. one might find it
more likely to approach the TRUE “60-minute knife” mark. This can be put down
to achieving peak efficiency (which is different for every maker). A
good example of improved use of time, is that it takes the same amount of time
to heat treat 20 blades as it does 1 blade. This is especially true with
stainless & high alloy air-hardening steels. Well, provided one has an oven
large enough… It is of course very dependent on the type of knife one is
wanting to make.
The 60-minute mark is not recommended, nor is it necessary, to be regarded
a good knifemaker. I think that patience is one of the very
best virtues a knifemaker can develop. While it is always good to challenge
one’s limits & abilities, a knifemaker, should only compete with one’s self, &
not with others. In order to make a good knife (& there is no point in
making a lesser knife…), a maker should simply take as long as he or she
needs.
HERE WE GO.
Note each of these frames, A., B., C., etc. denotes an approximate timeframe
of about 5minutes, +/- 1minute.
MAKING THE BLADE BLANK
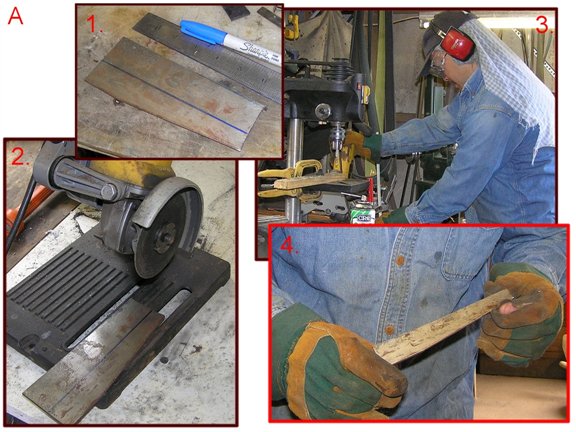
A. CUTTING THE STEEL.
1. I mark the rough blade stock I want, on 1/8th " thick O1 tool steel plate
2., 3. I use a mounted cut off saw with a 0.6mm abrasive disc to cut out the
steel I want. This is one of the most effective time saving pieces of
equipment for rough profiling barstock. I highly recommend it to knifemakers.
4. Here I have a bar of O1 steel, about 6-1/2inches long, 1/8th " thick &
tapered to account for the shape I will create later.
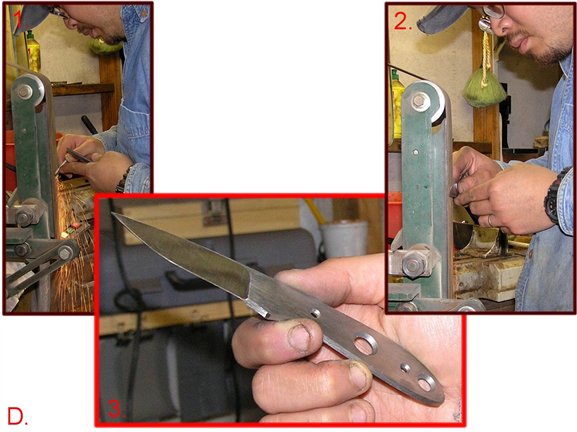
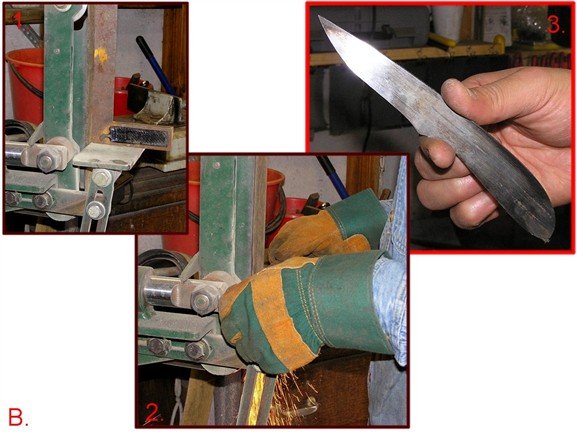
B. PROFILING THE BLADE
1. I set up the worktable on my Hardy Wangemann belt grinder with the flat
platen.
2. I grind the profile by hand, using an old 50grit 3M “Gold” Cubitron belt.
3. Here we have the profiled knife. Note that I profile the shape without any
drawings or scribed marks. I generally don’t work with templates & like to
form the profiles on the run. After profiling, I flat grind each entire side
of the blank to flatten it & remove any burrs from the heavy stock removal of
profiling.
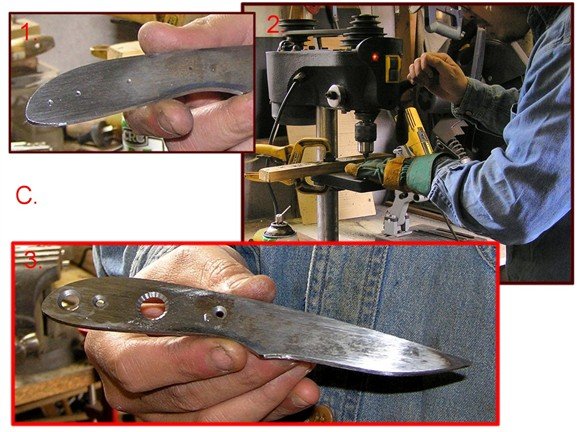
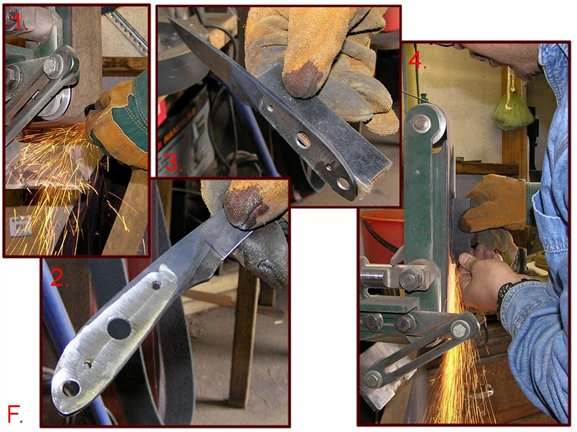
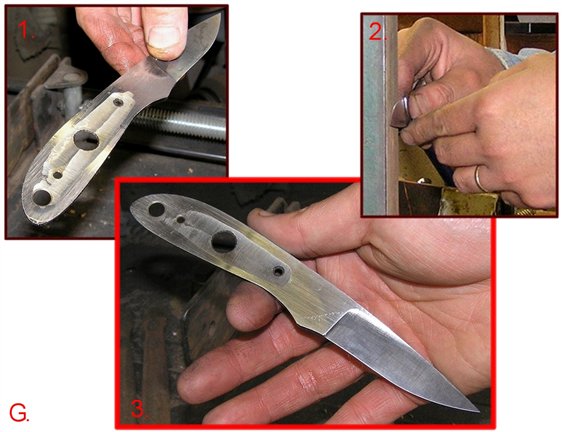
C. DRILLING HOLES
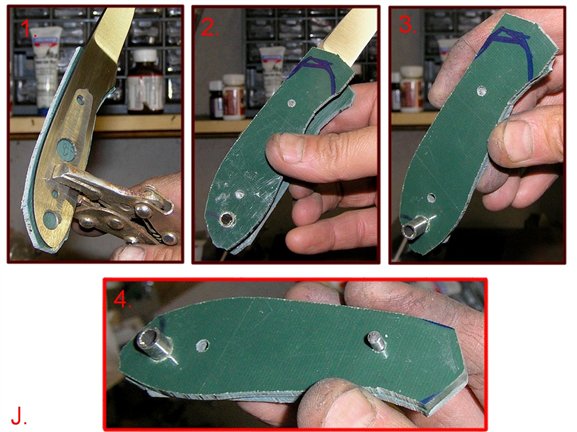
1. Center punch the location of the handle holes.
2. Drilling on a drill press with cobalt HSS bits & plenty of tooling oil. The
rivet holes are 1/8thinch, & the other 2 including the lanyard hole are
1/4inch. I then countersink each hole & the lightening hole is heavily drilled
with the countersink to remove more material.
3. The result. We are ready to grind bevels now.