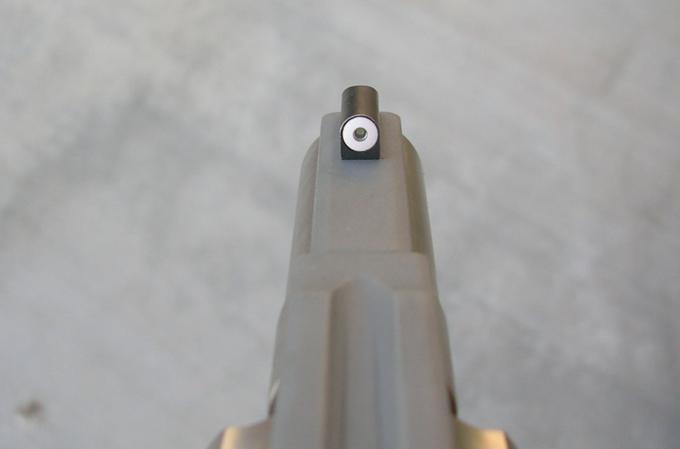
XS Big Dot sight installed on a Smith and Wesson model 60-9
Hi to all,
This page details how I installed an XS Big Dot Tritium 24/7 sight (RV-0001N-3) on my Model 60-9. While it will give you some idea about how it can be done, it is not intended as instruction; it's just how I did it. You can also read how others have changed pinned Smith & Wesson front sights by doing a search of the S&W Forum ; registration is required to do a search, but it is free of charge.
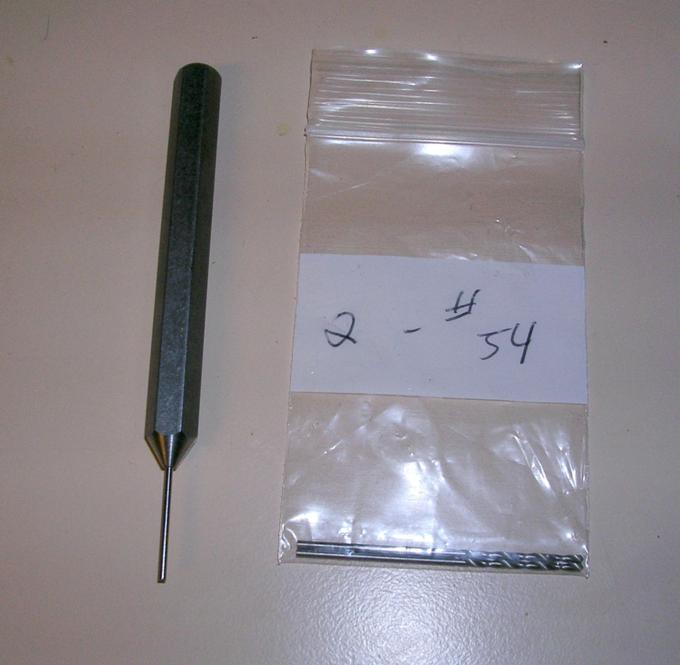
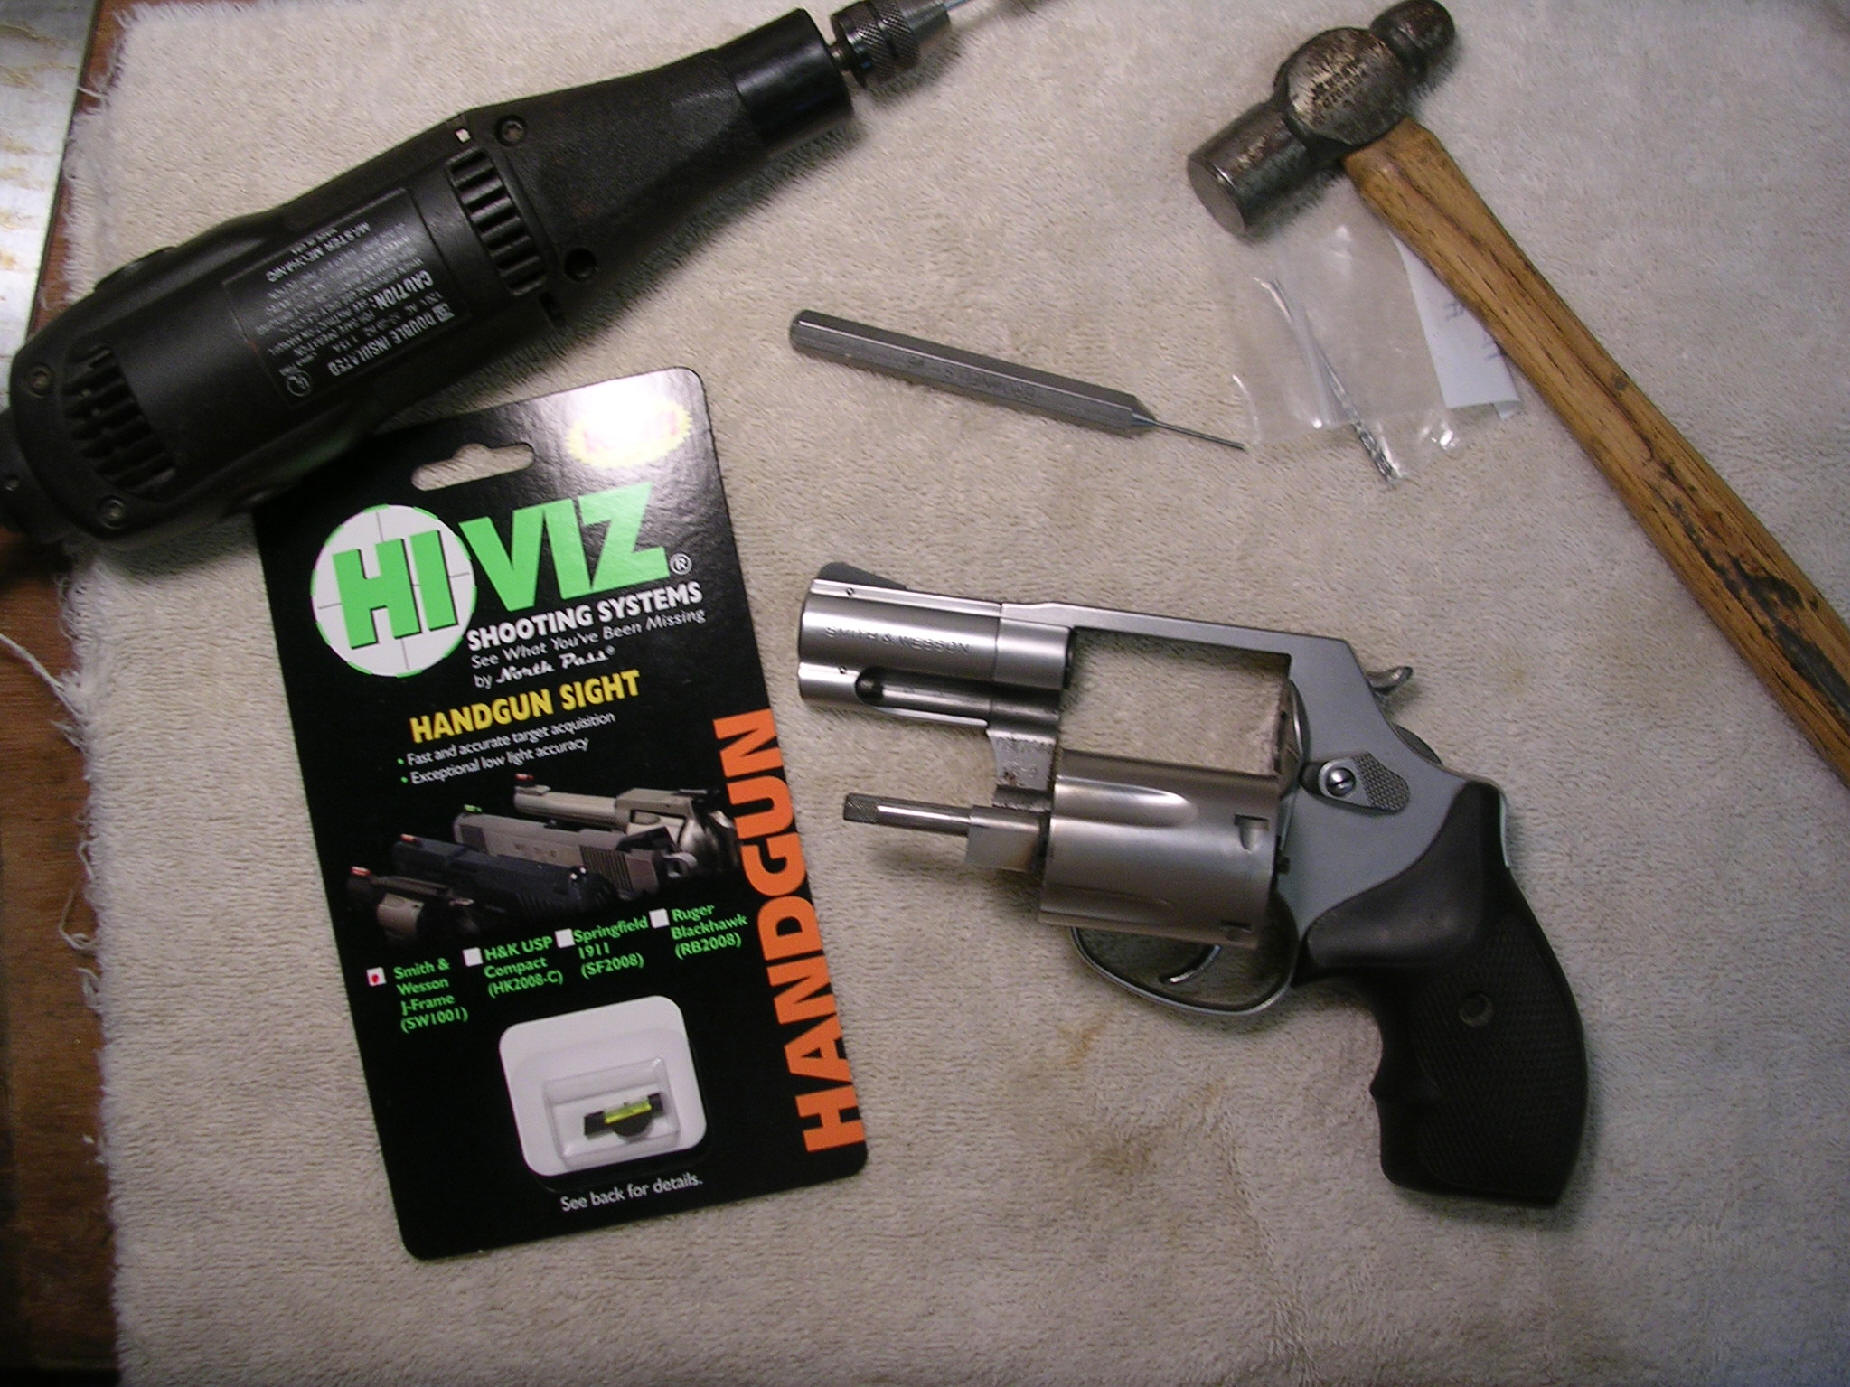
Here are the specialty tools needed (other tools are pretty common; hammer, files, drill, etc.):
#54 drill bit (the sight pin is.055" dia.) - I got mine from a seller on EBay. You may be able to find them locally.
.050" cup tip punch - I got mine from Brownells - (080-620-006) Model 6 .050" (1.3mm) diameter/long length, about $18. You can get the drill bits from Brownells as well.
* As an alternative to the punch from Brownells you might try this (as posted by clang444 on the S&W forum):
"... just purchase a 1/32" finishing nail punch from Sears ($3.49 for the Craftsmen) or some other hardware store and turn the tip down to whatever diameter you need..."
The punch will save the dome on the pin and makes it a little more secure
when driving out the pin.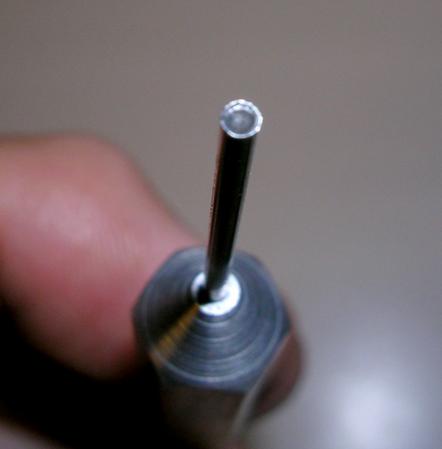
Clamp the pistol down and drive out the pin.
Note: as posted on the S&W forums by J Keffer: "The key is a very
firm, solid support, and short stub punches. The pins are not hard, but the same
applies to drilling. The setup must be very rigid. The fixture for such work,
cutting front sight keyways and such is rather expensive..and are adjustable for
different barrel lengths to place support directly under the sight while
removing the pin. I'd post a picture, but don't know how...
Good luck"
and by SW CQB 45: "you need a very short starting punch..."
The pin is straight and the hole does not seem tapered; so I don't think it matters which direction it is driven out.
This info was posted by s&w revolverman on the S&W forums: "Comment: with the barrel pointing downrange (perpendicular to you), the pin should be driven out from left to right. Installation would be the reverse."
Note: the barrel/sight may need to be heated up a little prior to driving the pin
out just in case it has had Loctite applied to it.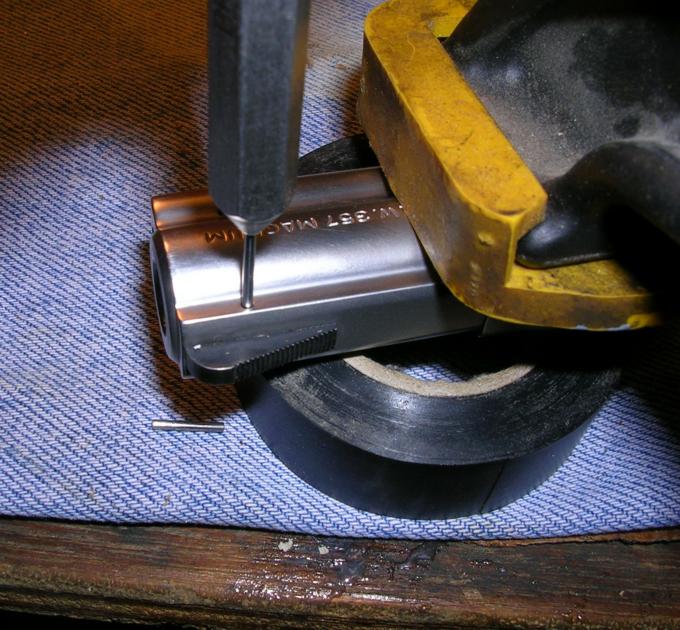
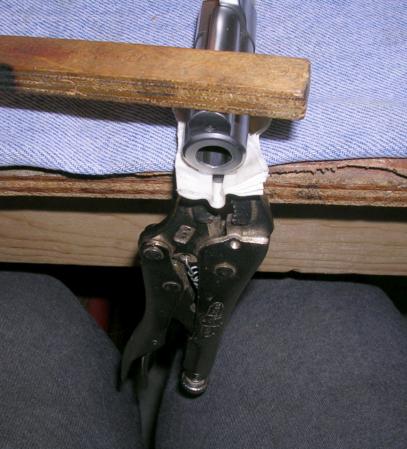
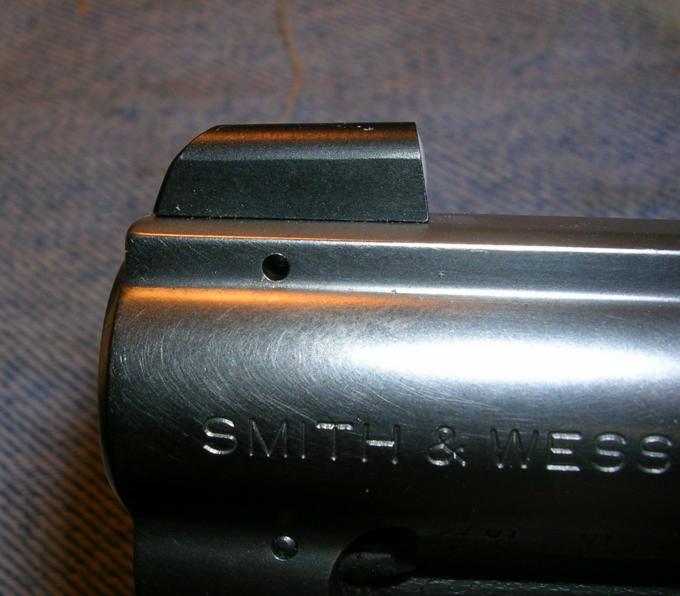
To remove the sight without damaging it; clamp a pair of vise grips to it
with something between the jaws to pad them.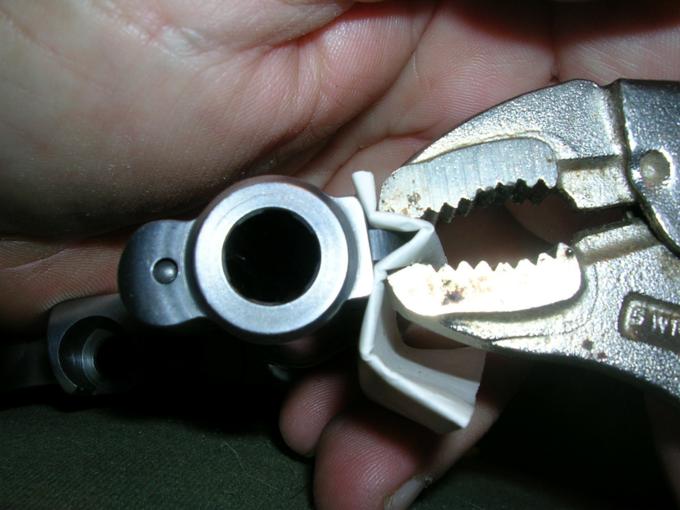
Then invert the pistol and tap the underside of the barrel with a non marring instrument/tool until the sight drops free. Don't forget to have something (my lap in this case) to catch it with.
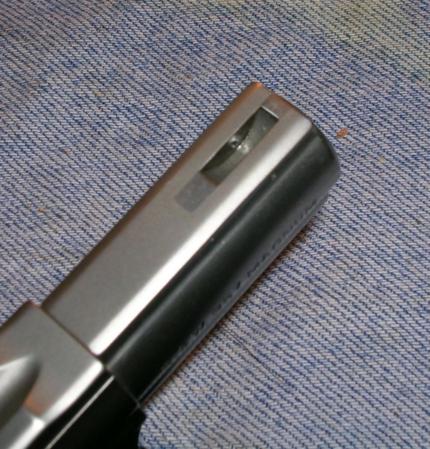
Here's the sight channel (all cleaned up). The original sight is a little longer than the XS sight. There an area on the barrel that does not match the finish of the rest of the barrel that the XS can not cover. This can probably be buffed out some or abrasive blast the whole rib.
.
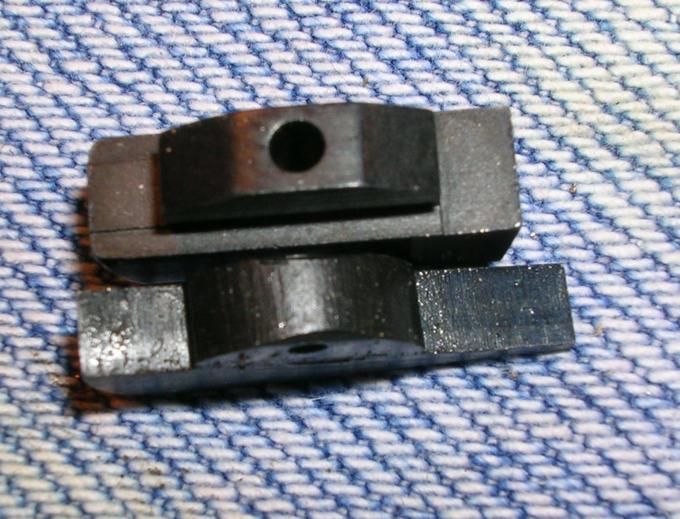
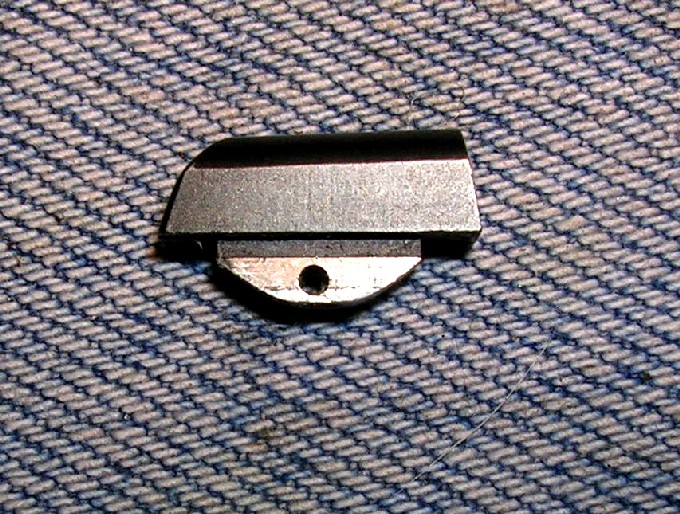
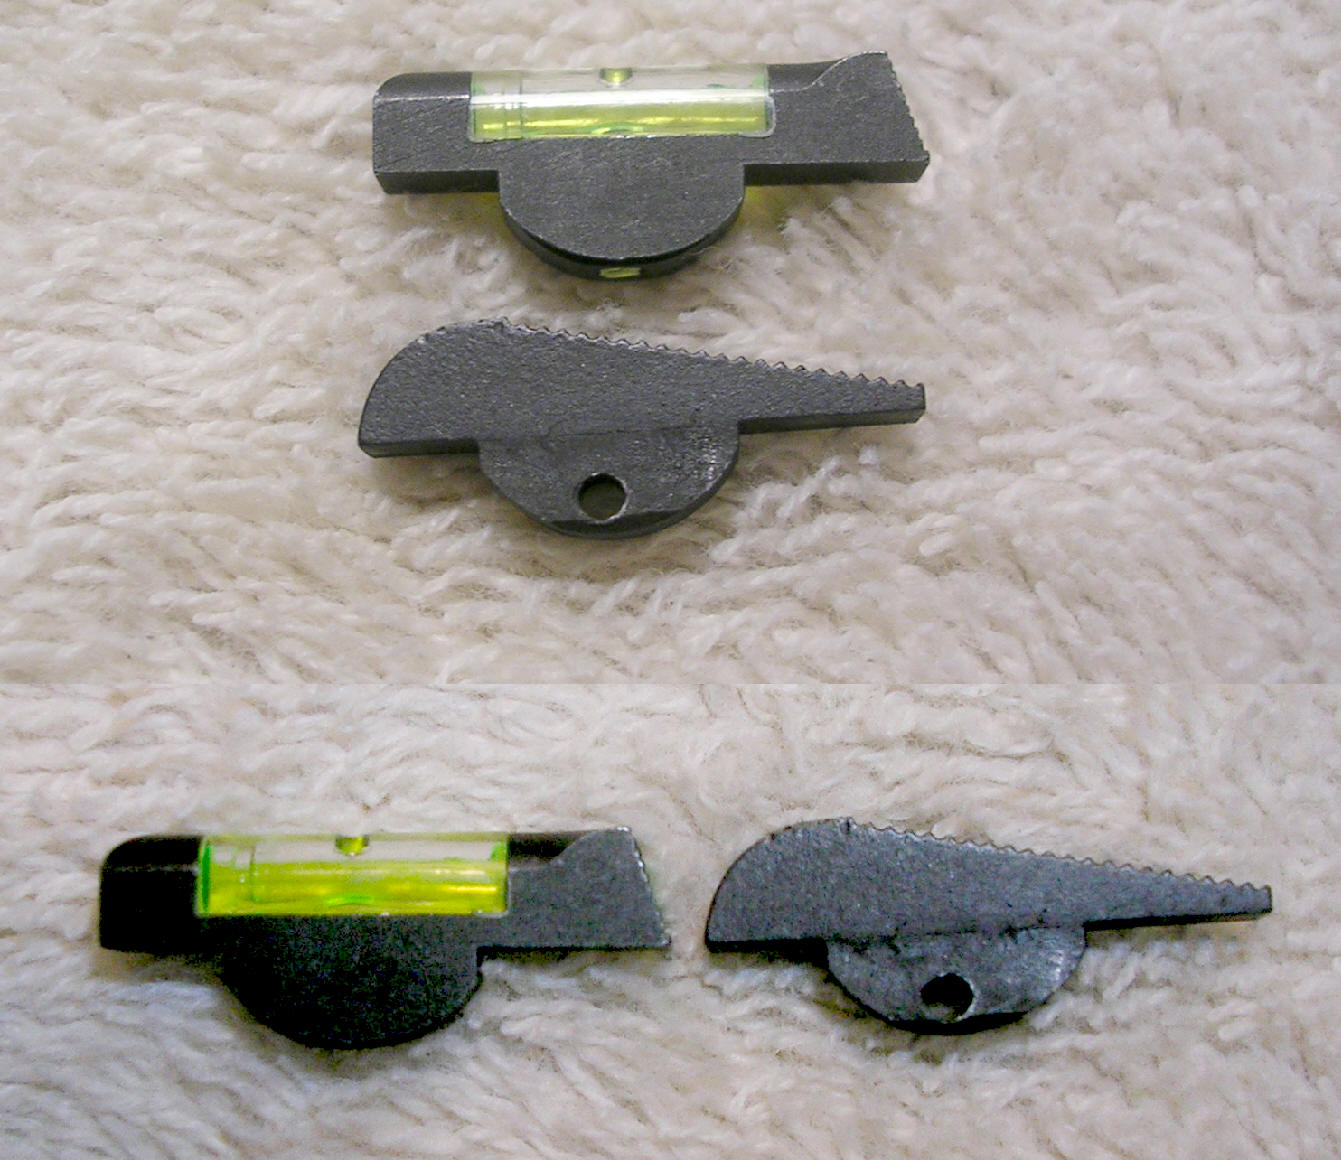
The XS and the OEM sight; as you can see, there is some fitting to do.
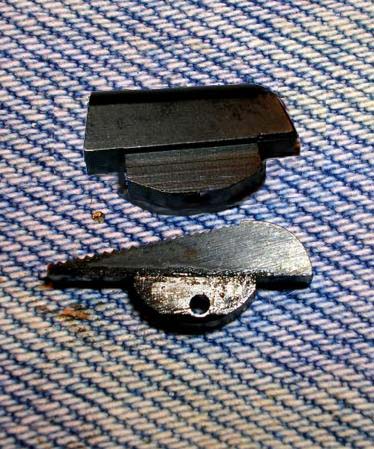
The XS tenon is a little wider than the take off sight. This extra width is not all of the tenon; the green highlight shows the area that will need fitting for width.
Notice the hole on the underside of the tenon; this facilitates the drilling of it (this is done by drilling half way through the tenon from both sides to install the sight).
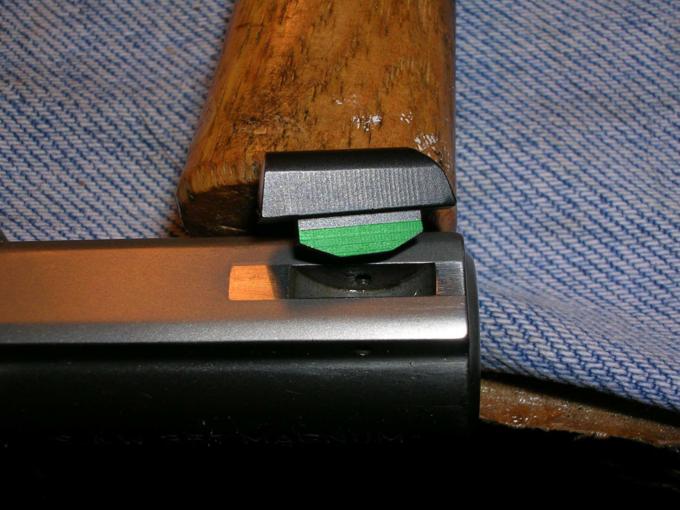
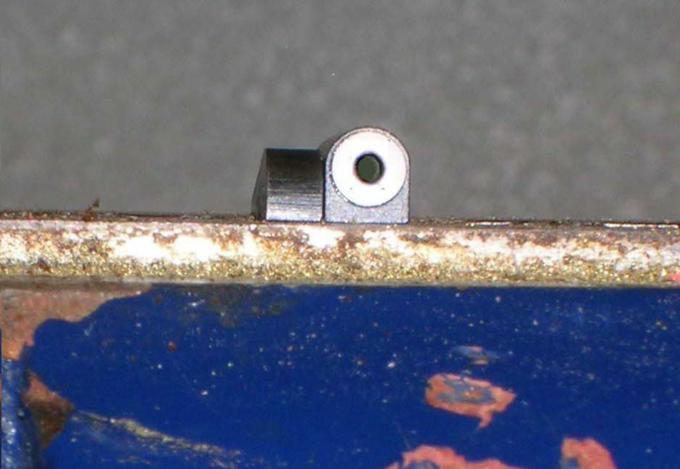
While both sights are off the Model 60; here's a little side by side photo. The tritium dot is about the same height as the top of the standard sight. Use that as a reference for maintaining the old sight picture when precision shooting.
Now just fit the sight with any tools of choice. I used jeweler's files and a
stone. It takes time and be sure to check the fit often.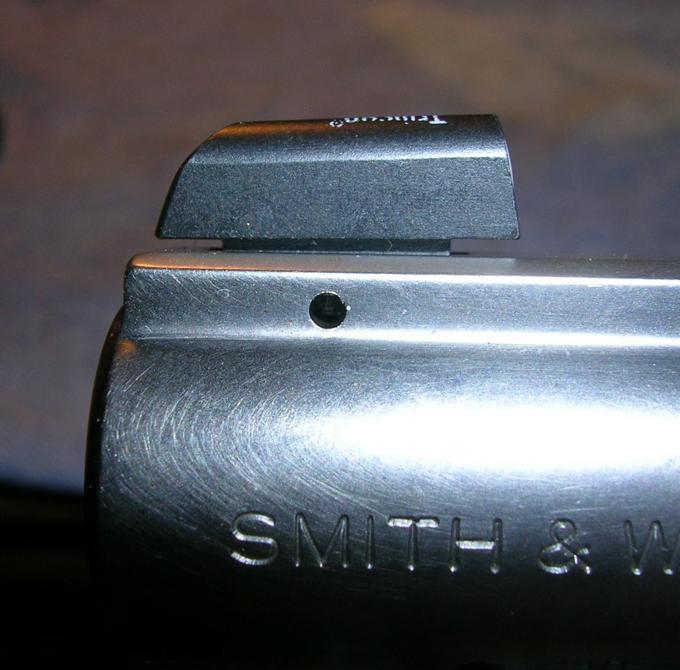
Looking pretty good about now. At this point, clamp the sight to the barrel and drill the hole. Remember: one from each side; half way through, using the hole in the barrel as the guide I did not take any pictures of this operation, but I did it free hand with a Dremel tool. UPDATE - Just to clarify: drill with the sight installed on the barrel (well at least that's how I did it).
Posted by Randy Lee on the S&W forum:
"Hi all,
If I might make a suggestion, it is usually easiest and best to fully seat and
secure the sight blade in position using red lock-tite This helps fill the voids
as the slot in the barrels are of a larger radius than the sights to allow for
all the variations in sight ramp dimensions that exist from model to model.
A padded c-clamp can be used to hold everything together if the blade itself is
sloppy in the ramp cut. Let the lock-tite set up for about a half hour or so.
Then using a sharp #54 drill(available at many hardware stores) drill thru from
each side of the sight ramp. The original pin hole on the side of the ramp will
act as a pilot. I secure the barrel in a paded vise and use a hand held drill. I
drill for roughly 15 seconds alternating sides until the holes meet in the
middle. Eventually the drill will pass thru both sides of the ramp. Once the
hole is clear of debris, add a dab of lock-tite to the pin and tap into
position.
The reason I recommend this procedure rather than removing the sight to drill is
that it maintains the snug fit of the sight in it's recess. The alignment of the
hole thru the sight is maintained relative to the holes on each side of the ramp
as well. The fact that the hole in the sight is not perfectly aligned
axially is beneficial as it helps hold the cross pin in place with a slight bit
of tension. Hope this helps..."
As an alternative to this method, please read this:
Posted by 625smith on the S&W forums: "I changed the pinned sight on my 627. I must agree with Double-O-Dave the old sight can be difficult to remove. I removed the pin with a Brownells cup tip punch #080-620-005AA .050". I fitted the new front sight in the pistol. I used a pin vise with a #54 drill and carefully drilled both sides of the new sight just enough to get the point of the drill into the sight. I then removed the new sight and completed drilling in a drill press. I drilled half way through the sight them flipped the sight over and finished drilling through the sight. Do not get in a hurry and I am sure you will have success."
By Joni-Lynn: "When installing the new blade, place it in the slot, adjust it fore/aft to where you want it to be and then mark it from both sides for the hold location. Unless you're really talented at making perfectly aligned holes I suggest drilling the sight out of the gun and then installing it. You can always buy another sight blade but if you remove metal from the sight ramp it'll be hard to replace."
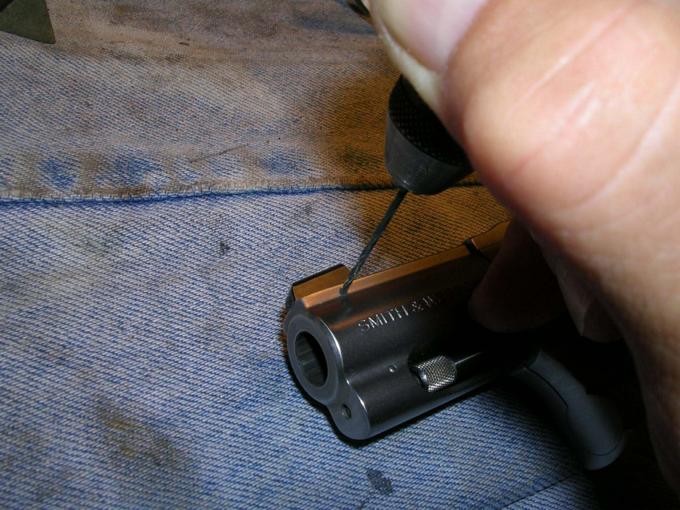
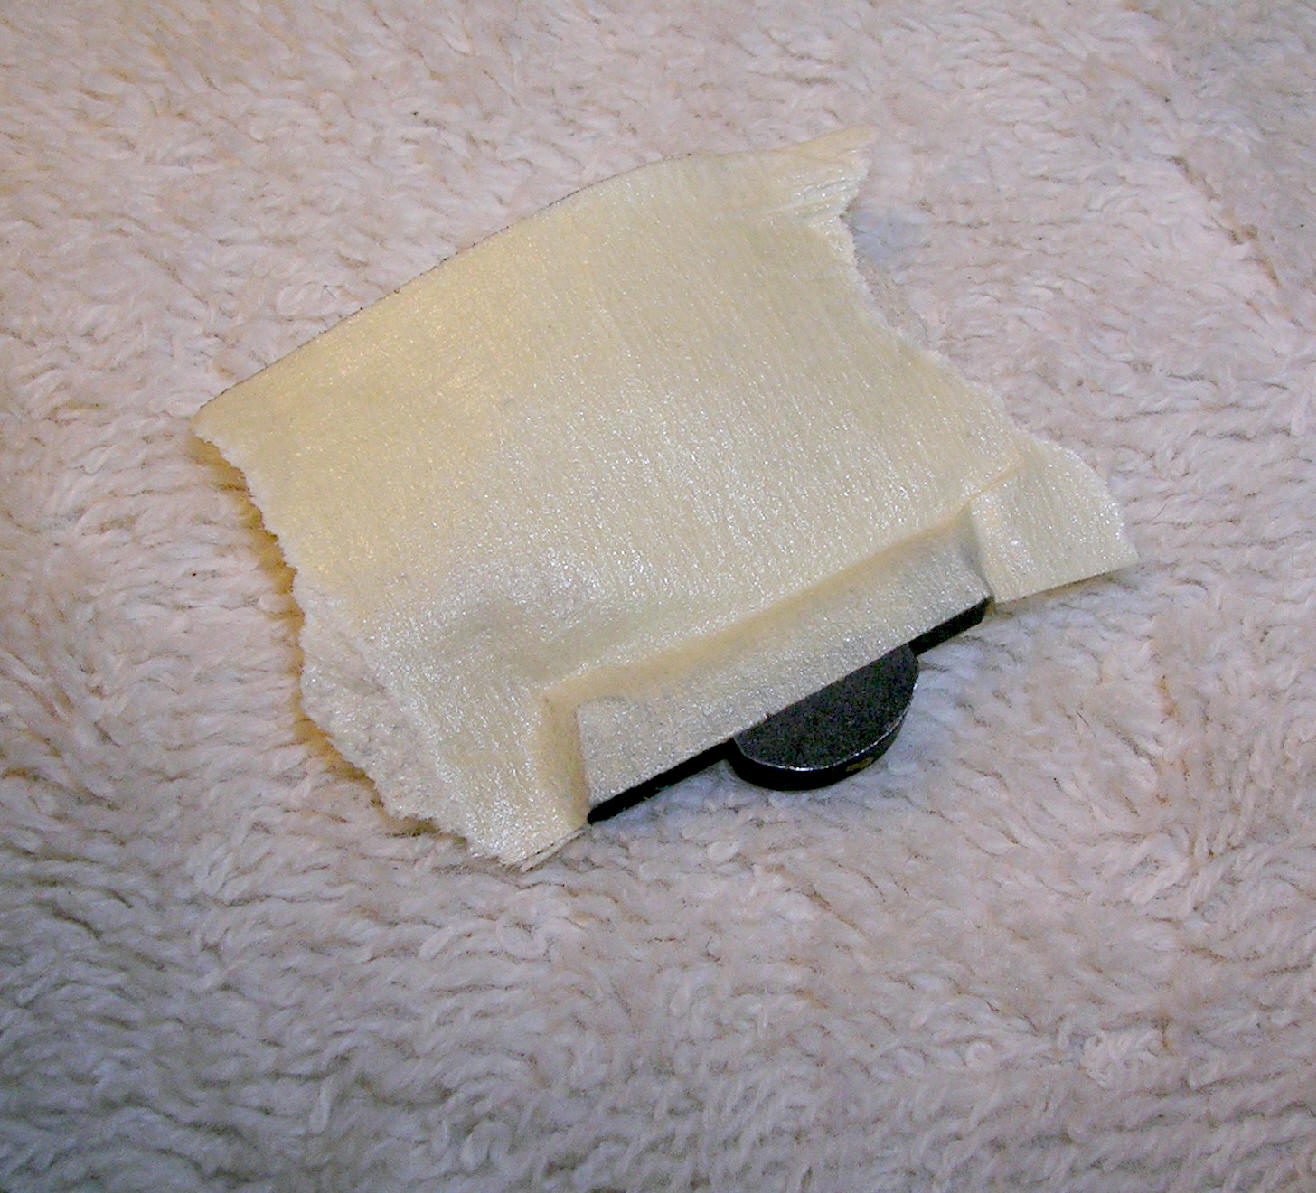
Here's a reenactment photo (with a tight fit you could probably forego clamping the sight and hold it on with finger pressure. I did the HIVIZ sight {further below} that way):
Once the holes are drilled, pin the XS in place. XS recommends red Loctite. My original sight looked like nothing was on it before hand and I had a great fit with the new XS, so I have skipped the Loctite for now. BTW, you can buy sight pins from S&W and Midway USA. If something goes amiss you can also buy on oversize repair pin from here; it's a correct length 1/16" roll pin.
I also did a bead blast finish on the the Model 60 prior to the final installation of the sight.
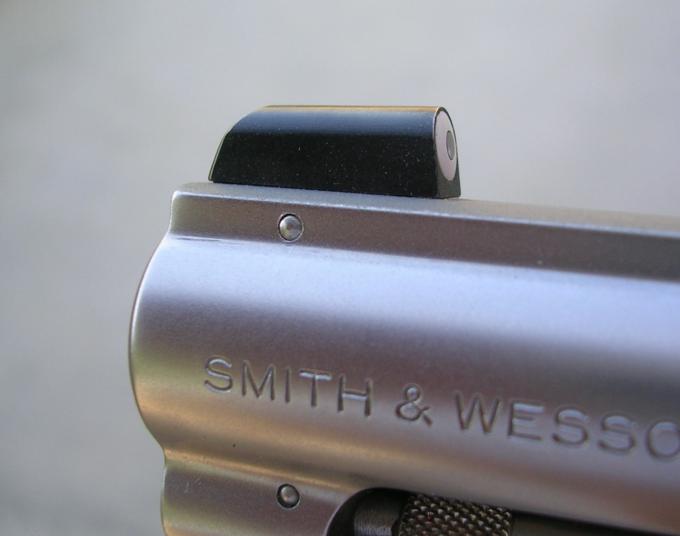
The original sight fits flush with muzzle end of the rib; I fitted the XS a
little rearward of that. I think it's a matter of choice.


A little follow up here:
It turns out my fitting of the Big Dot was nothing to brag about.; there was a little side to side play after putting about 150 rounds down range. There must have been a burr that was giving me the tight fit before (well that's my excuse :)). Any way, I had some blue Locktite on hand and everything is tight again. There was never any sign of the sight pin trying to walk out,
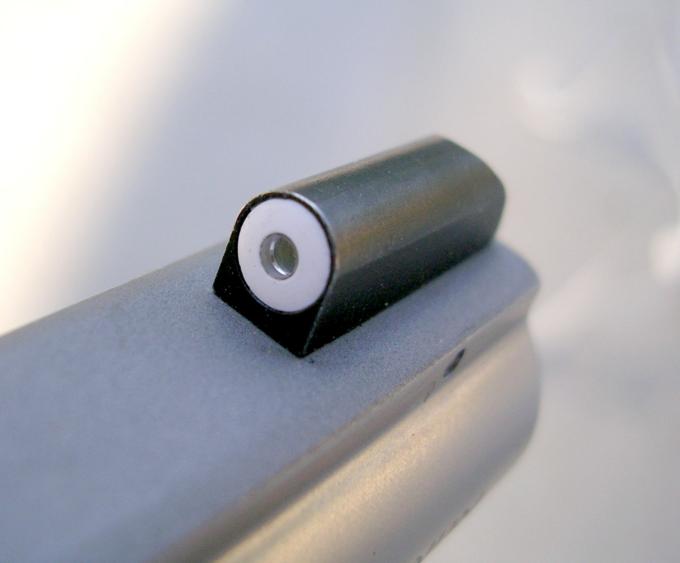
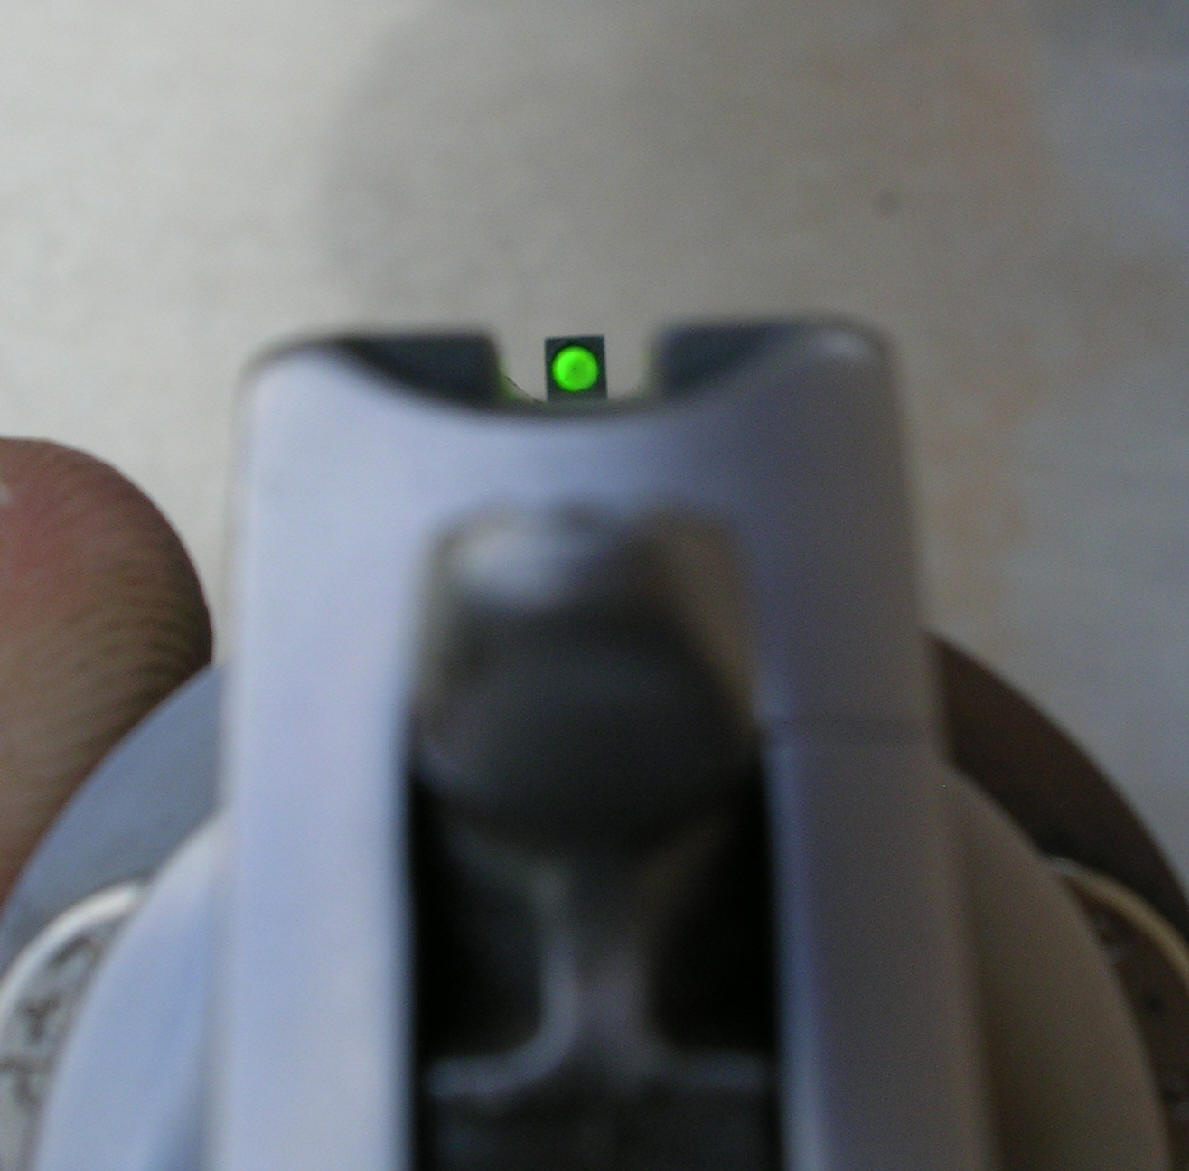
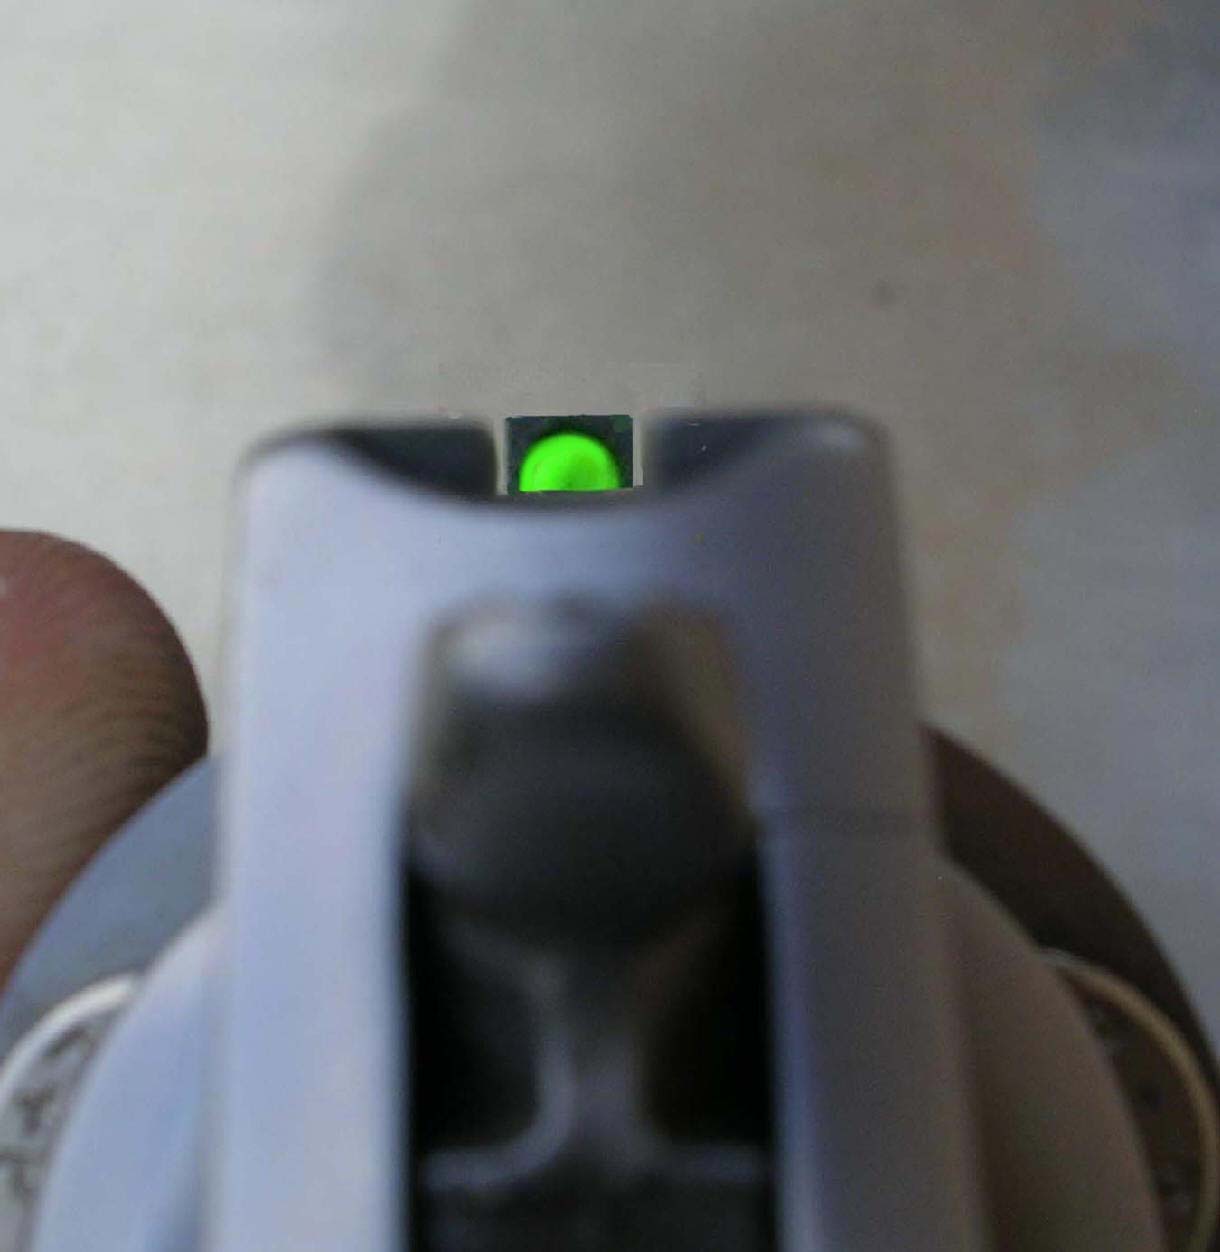
I also deepened the sight groove to give a little better sight picture (the notch width was left relatively untouched):
Before After
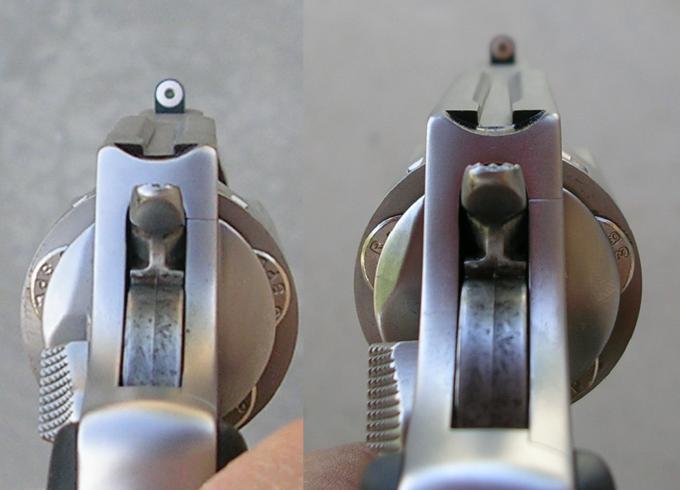
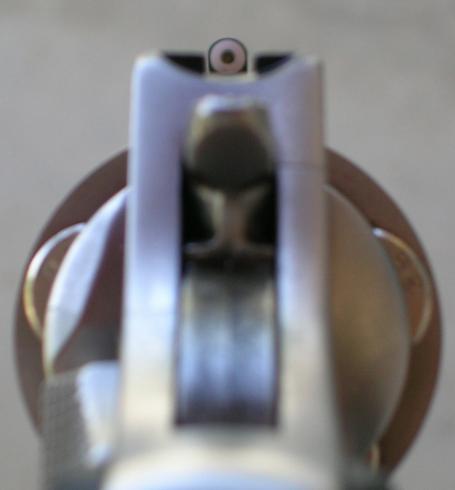
I believe the sight picture in the photo has some depth of field distortion, because the white dot completely fills the notch
to the naked eye. Then again, my eyesight isn't that good and the error could be on my end.
Well, more follow up:
I've used the Big Dot for several weeks now and think it is a fine sight for "fast and furious", "up close and personal" self defense shooting. The night sight feature is nice addition in that role also. I like the look of it on the Model 60 as well.
That said, I took it off. I use my Model 60 for other types of carry besides self defense. It surely gets shot more as a trail gun. I need a more precise sight picture for that role and XS just doesn't work for me; maybe the standard dot would. So for now, I've returned the factory sight blade to the barrel. I did parkerize it and then hit it with some bake on ceramic paint. This has always been an accurate piece and the deepened sight channel from the XS install is a plus.
As to the night sight feature, I have a line on a sight blade similar to the factory one with a tritium insert. I just need to do some more research on it.
I thought I might add a couple of links to some sight set ups for people that want a better sight on their snub.
http://www.dlsports.com/dl_jframe_sw_sights.html
http://www.bowenclassicarms.com/NEW/SW_J_FrameSightNotes.htm
Images for the Bowen sights are here: http://www.bowenclassicarms.com/NEW/SWpackages.htm
UPDATE:
Well, I've read some things that disturbed me about the quality control on the tritium insert front sight blade I had a line on and I have decided to forego it for the moment. As I have not seen on in person, I'll just leave the manufacture's name out of the equation for now.
I did decide to try a HI VIZ front sight. The part number is SW1001 - S&W Sub 3" J Frame pinned front sight
This is an over molded sight in either green or red.

You'll need the same tools as used for the XS sight install.
The procedure is pretty much the same as well, except as noted below.
The HI VIZ sight is the same height as the original front sight (more on this later) and about the same length (sorry that's just an eyeball estimate).
It will require fitting and drilling. Note: while the fitting is not as extensive as that required on the XS, it does require a little more attention to detail. I needed to tape the sides of the sight to prevent damaging the visible (after installation) part of the sight.
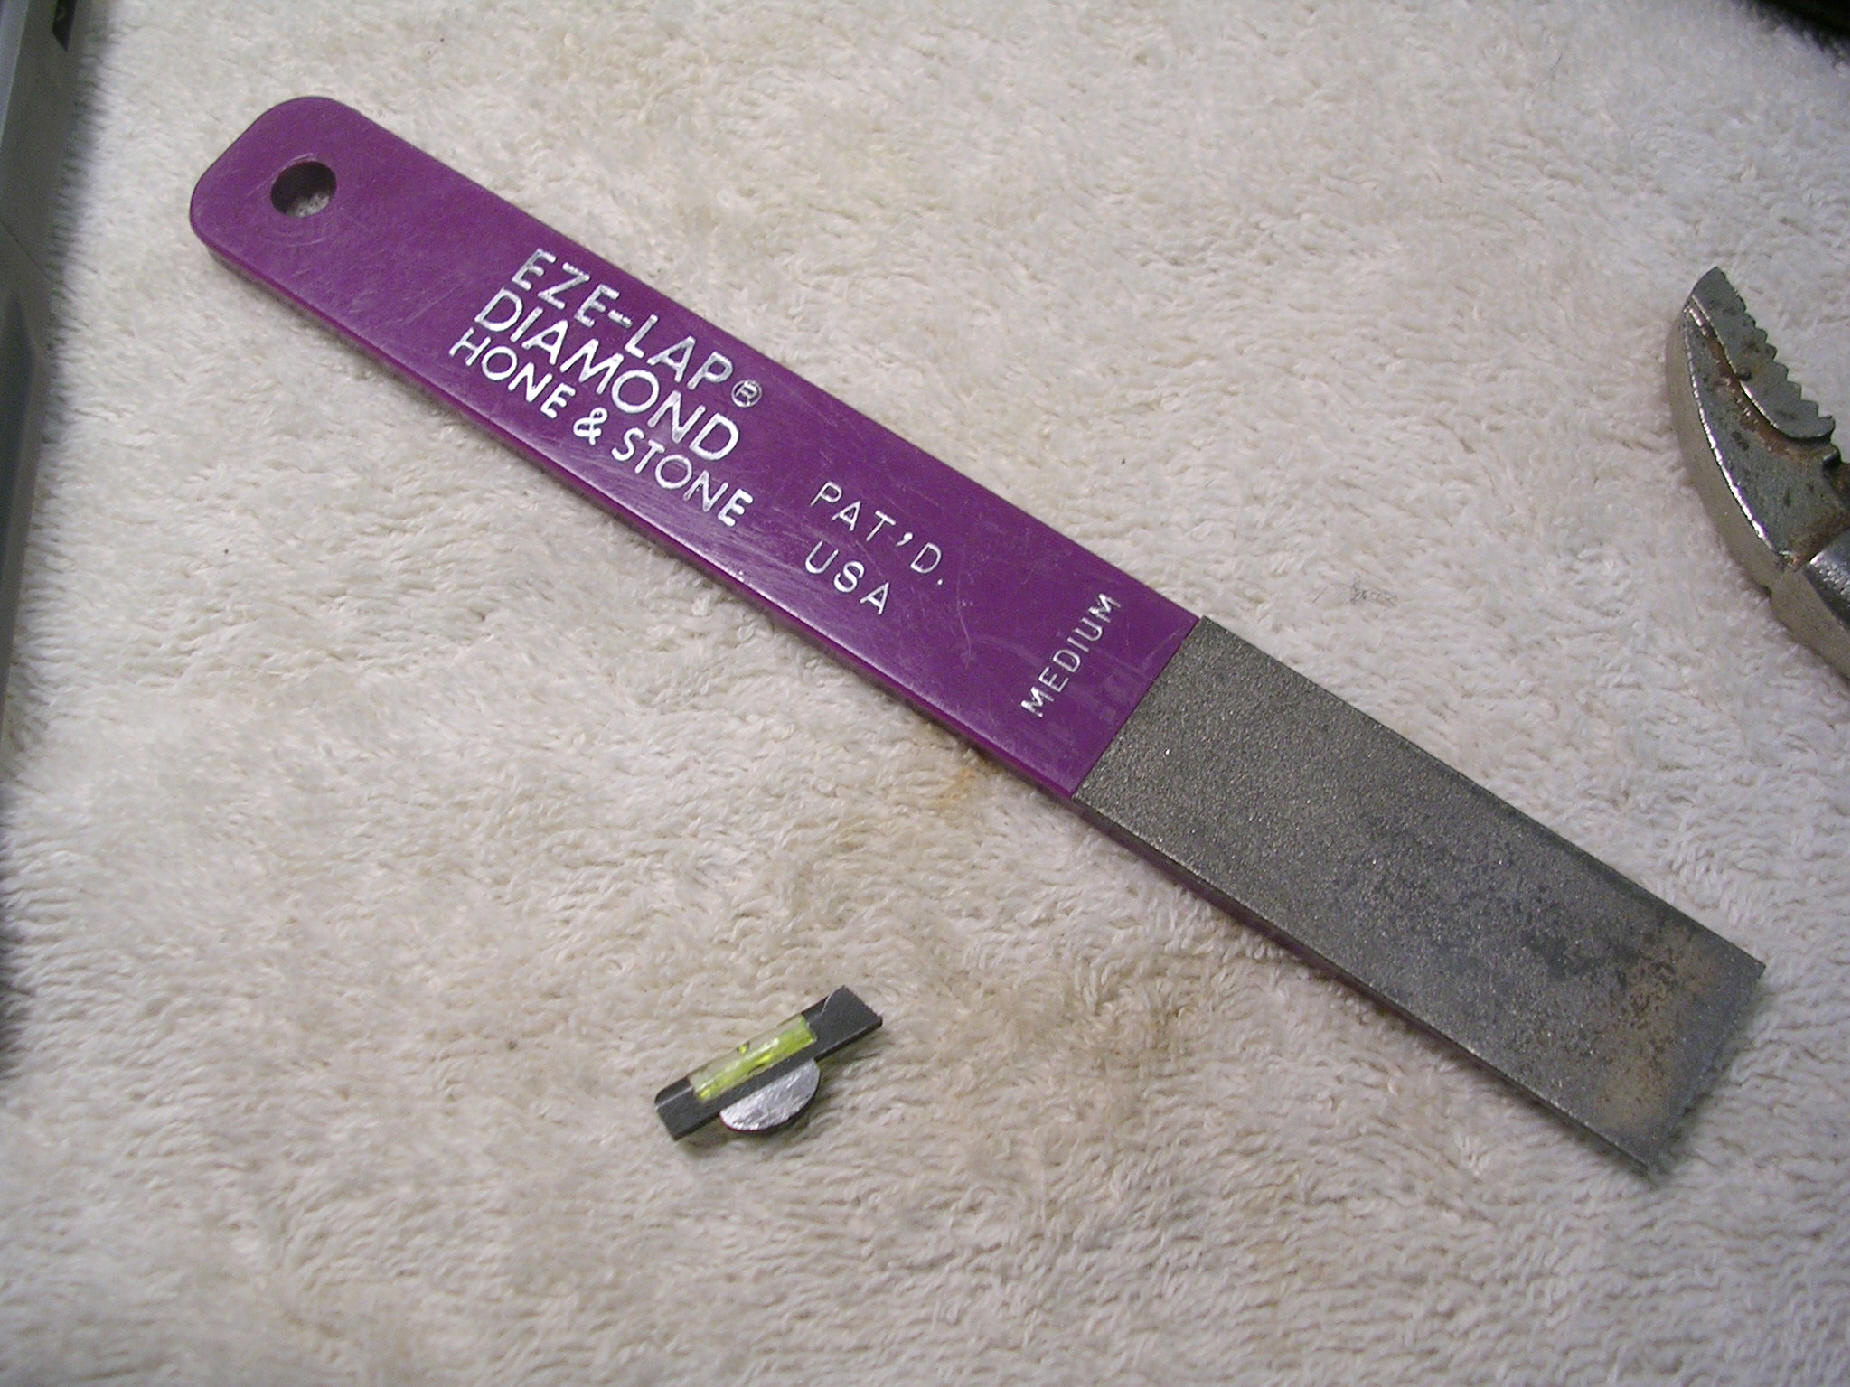
To do the fitting, I used an EZE-LAP diamond hone & stone.
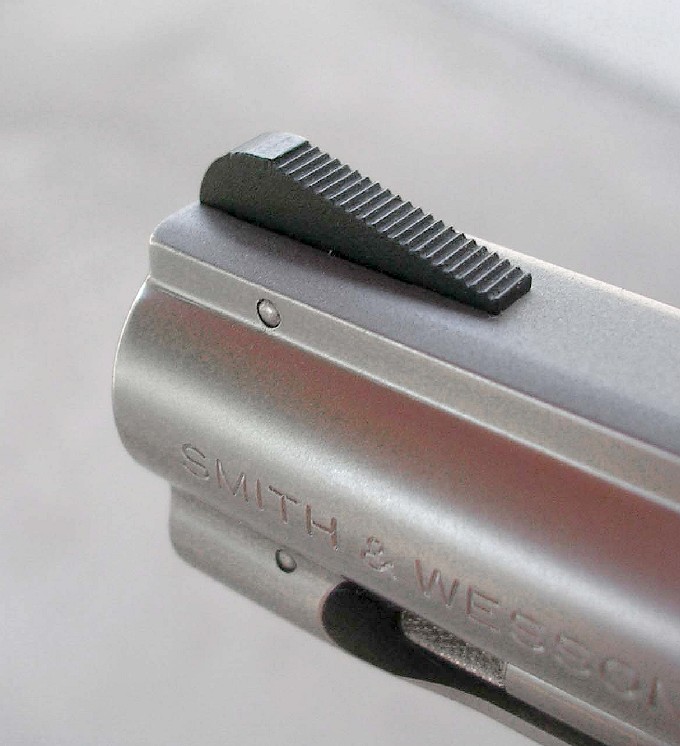
All fitted up and installed:
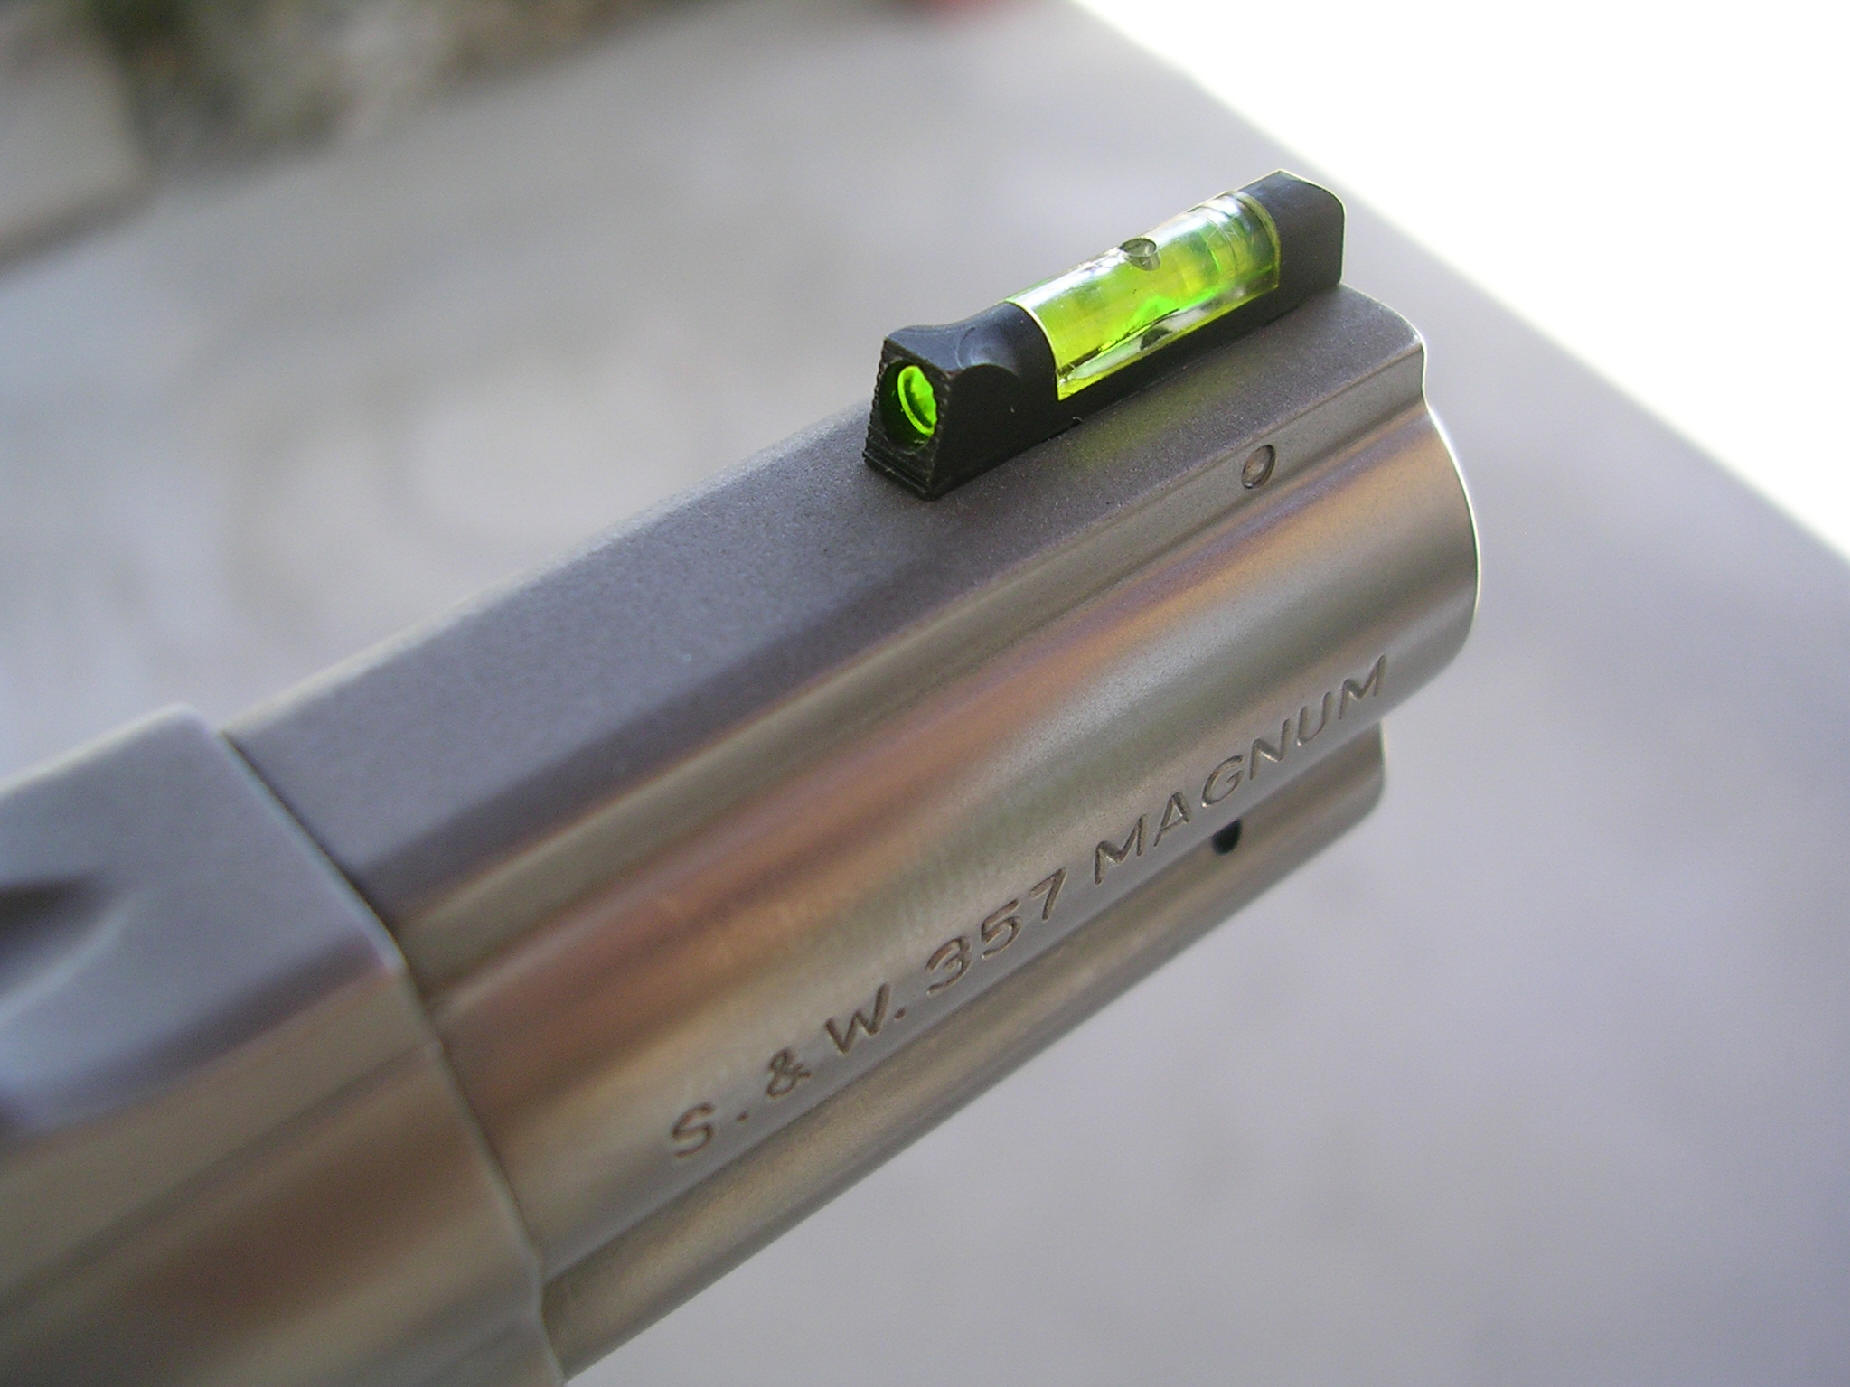
Here's that depth of field distortion when looking through the camera lens at the sight picture:
Here's a Photo Shop adjusted photo that show more closely what your, well my eyes, see. That being; using a normal sight picture, with this sight (being the same height as the OEM sight) not all of the sight pipe is visible (remember, this is even after I deepened the channel some for the XS sight). However, just looking at it, I don't mind this sight picture. I'll need to take it out and shoot it some to see how it works out...stay tuned!
Ready for the range.
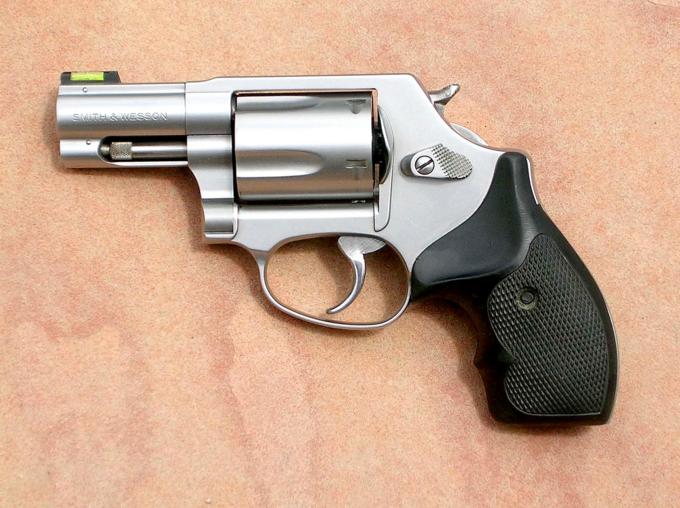
Well, I guess I'm like the kid in a candy store; I just can't make up my mind. I've reinstalled the XS and deepened the sight channel to improve the sight picture with it. Stay tuned, I'll probably change my mind again LOL.
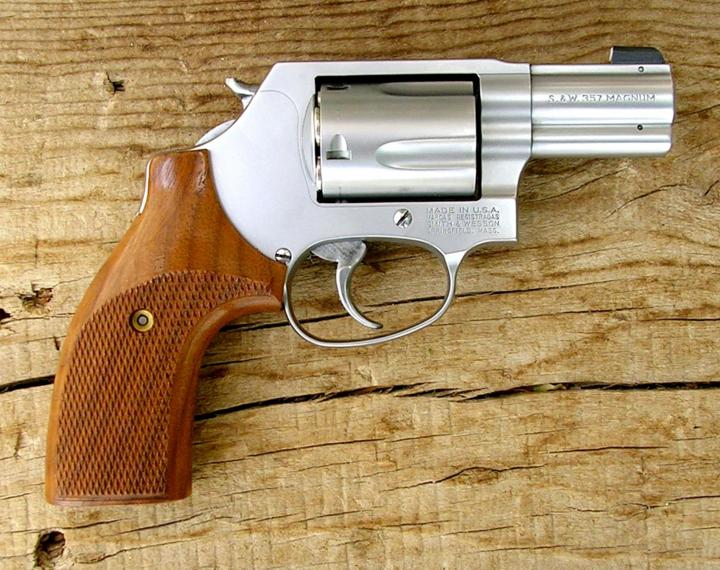
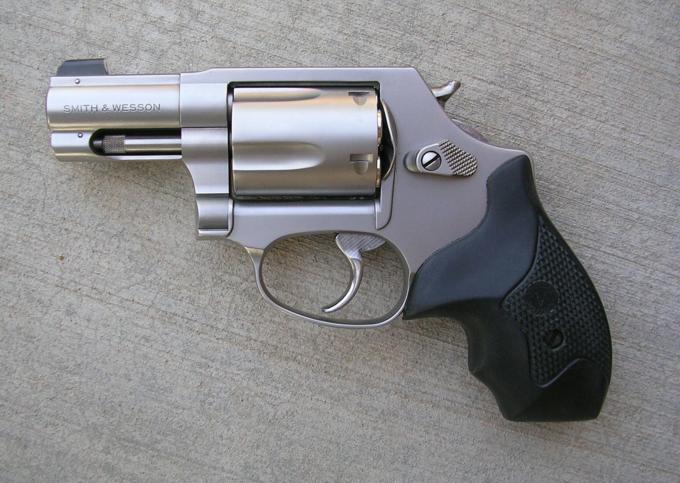
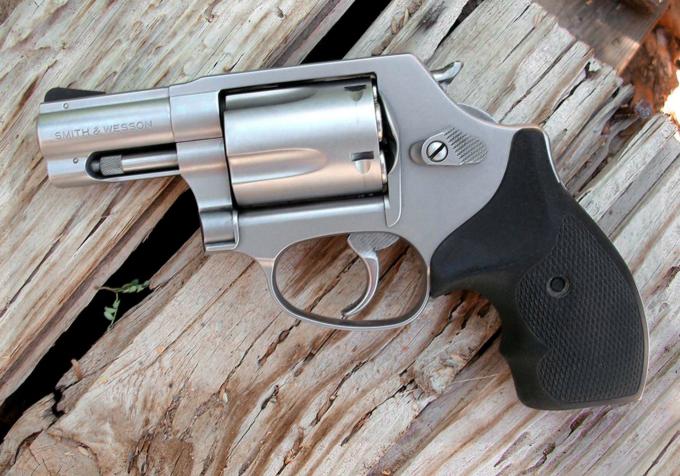
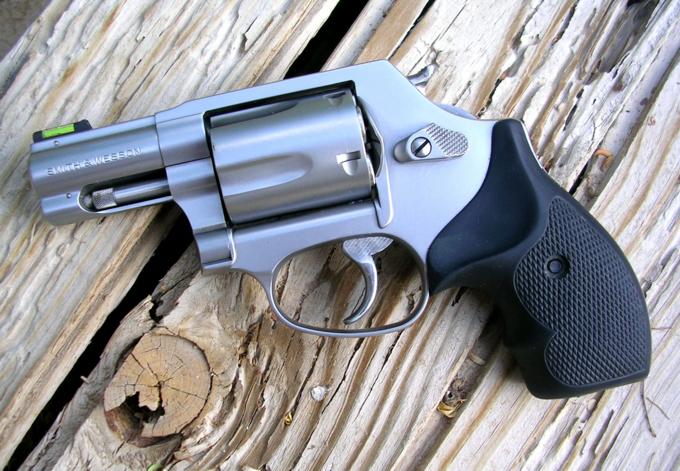
New grips, but still running the Big Dot!

Regards, Greg
Questions?